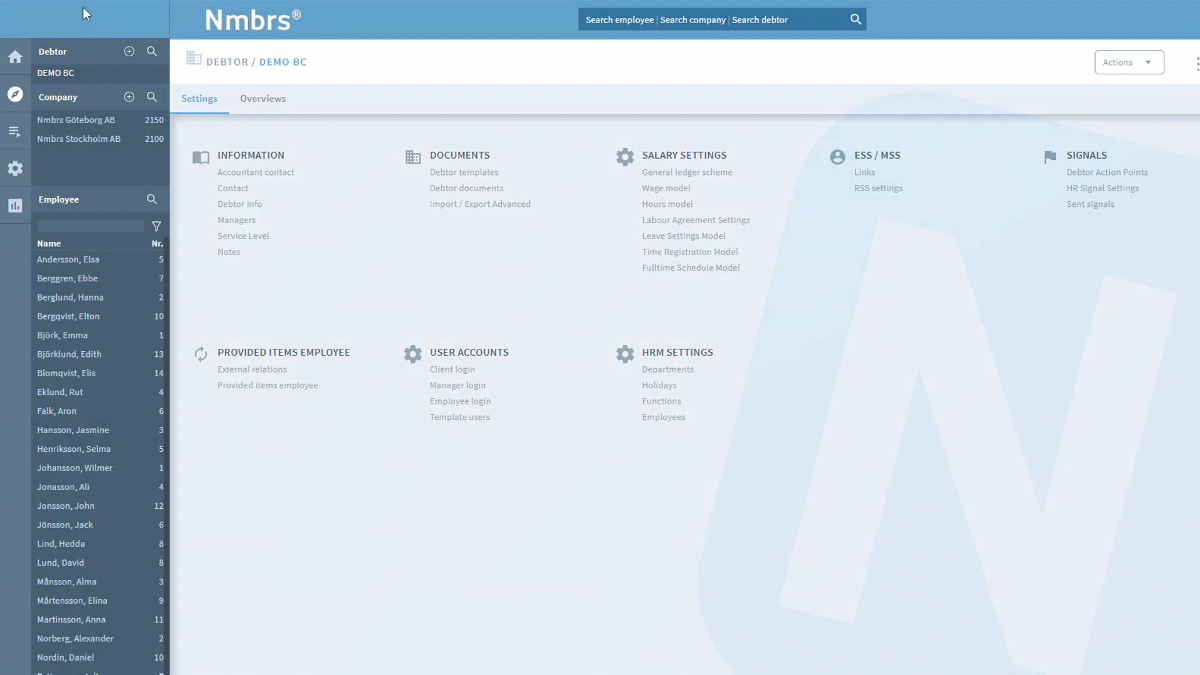
There are several ways of adding a new employee to Visma Nmbrs: via the 'New employee wizard' or by copying an existing employee. You can also enter multiple employees using the Import function.
Defining one or more Default employees can be a considerable time-saver when entering multiple new employees. For more information on default employees, see: Default Employees.
Note: If you have created a new employee whose service interval commences after the current period, this will not appear directly in the employee list. This is because the employee service interval has not yet started. You can find this employee via the filter, which you can then set to start/end service interval. Click Save and you'll see the employee.
- Adding a new employee with the wizard
- Copying an excisting employee
- Importing an employee
- Minimum required data
Adding a new employee with the wizard
If you want to use the wizard, you can do this by selecting 'Actions' -> 'New employee' at company level.
Once you've created a default employee, select this in the Default employee option. Then enter the employee's personal details. When you click on Next, the data is automatically verified. A warning will appear if there's an incomplete entry.
After the wizard is finished, the name that is to appear on the payslip can be entered in the personal details dashlet.
In step 2 you fill in the employment contract details: at least the Start and (where applicable) End date of the contract and whether payroll tax credit is applied. Here you can also select categories such as department and role.
- If the employee's start date is earlier than the company starting period, just leave the start date in the period you are entering. Once you've fully completed the wizard, you can delete the employment contract details and re-enter them with the correct start date!
- If an employee starts work after the current period, you can set the current period to the desired month before selecting the "in service" wizard. You can then go through the same steps. NOTE: The employee will be considered as not in active service for the period prior to starting service.
- All employees actively employed during the period that is run will be included in the relevant run. If no salary and/or hours are specified, a blank slip will be generated. This is necessary because employees with an active employment contract must be included in the wage tax declaration.
If you've selected a Default employee in step 1, the default data is entered in step 3.
- Here you can enter the employee's schedule. If the employee is paid by the hour, set all schedule hours to 0. Note: for an employee who commences service halfway through the period, you still enter the full-time or part-time roster and salary as an entire period!
- You then enter the employee's period salary. You can choose from different salary options.
- Select the salary table (if applicable) here.
- Here you can enter the employee's fixed salary components and the value. If someone commences service halfway through the period, activate the Pro rata box. In this case the salary component will be calculated pro rata for this employment period only; in the subsequent periods it will be the full amount as entered.Then click on the plus sign to add the remuneration permanently.
In step 4 enter the dates of the completed and planned action points; check them if they are already completed. Then click Finish to save the details of this employee.
When all details have been entered correctly, four green ticks appear. Click "Go to employee" to go to this employee if you wish to change any other details or view the interactive payslip.
Below is a moving image that briefly shows how to use the filters. Open this GIF in a new browser tab (Right click---> Open image in a new tab) to view this clip in a larger size:
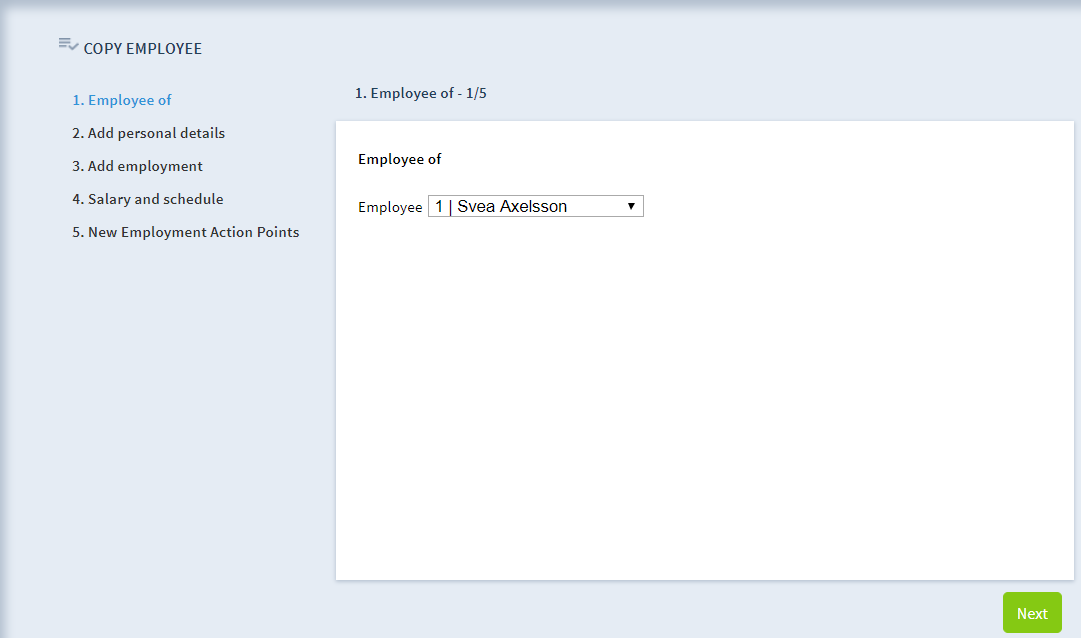
Copying an existing employee
Within Visma Nmbrs you can copy an employee via a wizard. This wizard can be found at company and employee level under "Actions":

Once in the wizard you can select an existing employee and then click "Next":
The data of the selected employee will be displayed in the wizard:
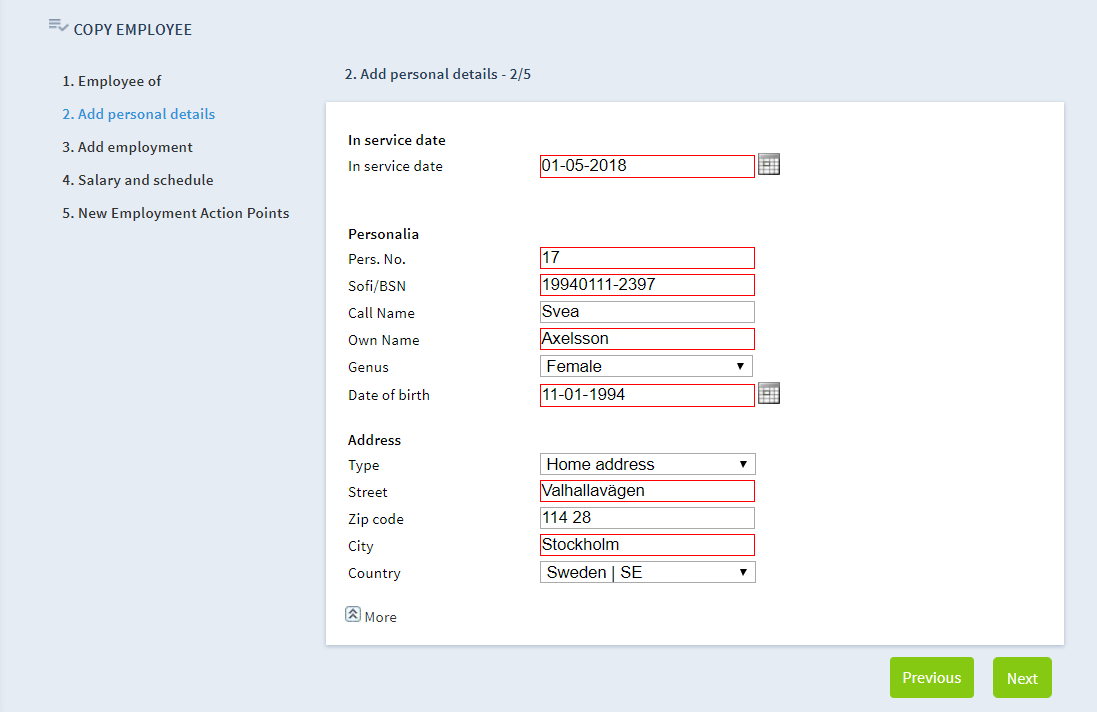
Go through the wizard and modify the data if necessary.
Importing an employee
With the import function, several employees can be processed at the same time. This is done by filling out an Excel file with all details of the employees you want to enter. You can then enter the Excel file by means of the import function at company level.
Refer this article for more information.
Minimum required data
After creating an employee, you need to enter several details before you can include the new employee in the payroll run. The list below shows which dashlets must be filled in at all times from the period when the employee commences service.
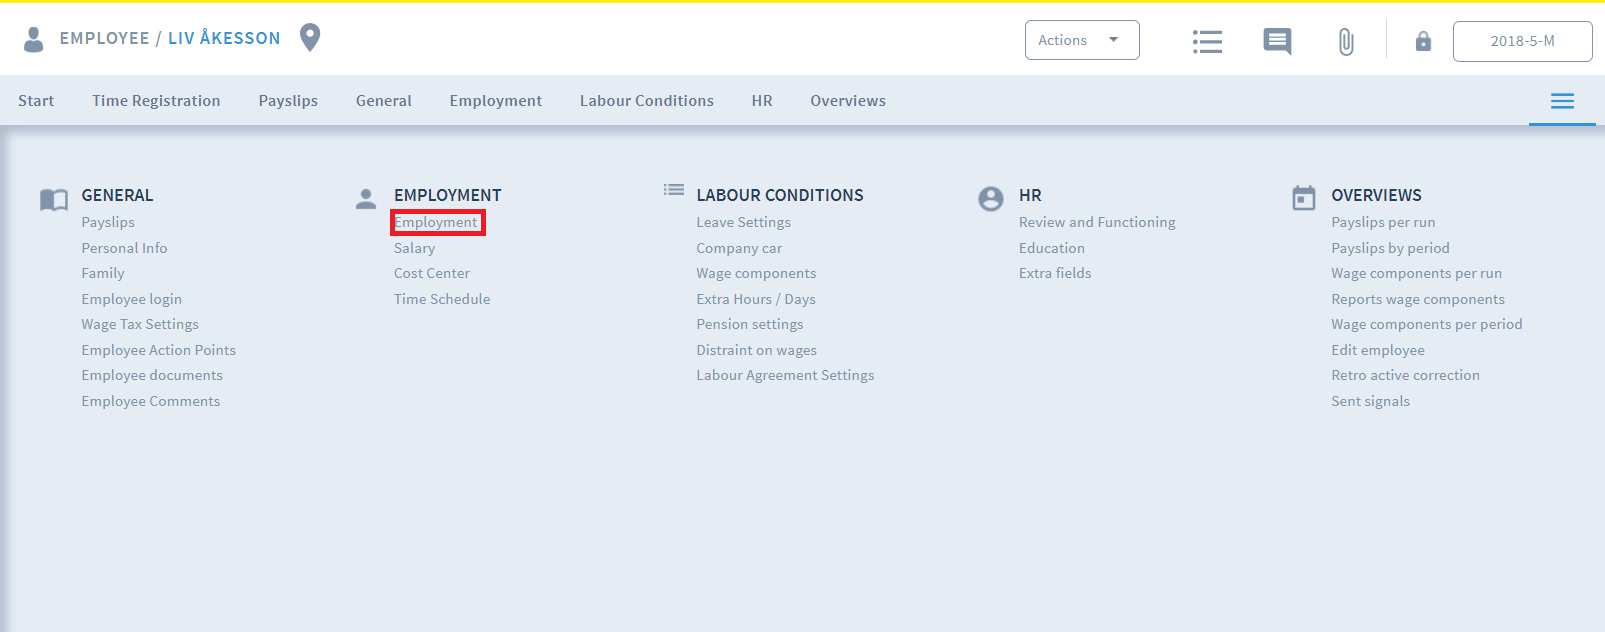
Employee service interval and contract
Make sure the "Start/End service" and "Contract" dashlet is filled in from the period that the employee commences service. You can enter this information in the "Employment contract" dashlet. To get to this dashlet, click the menu button at the top right of the screen and go to "Employment contract".
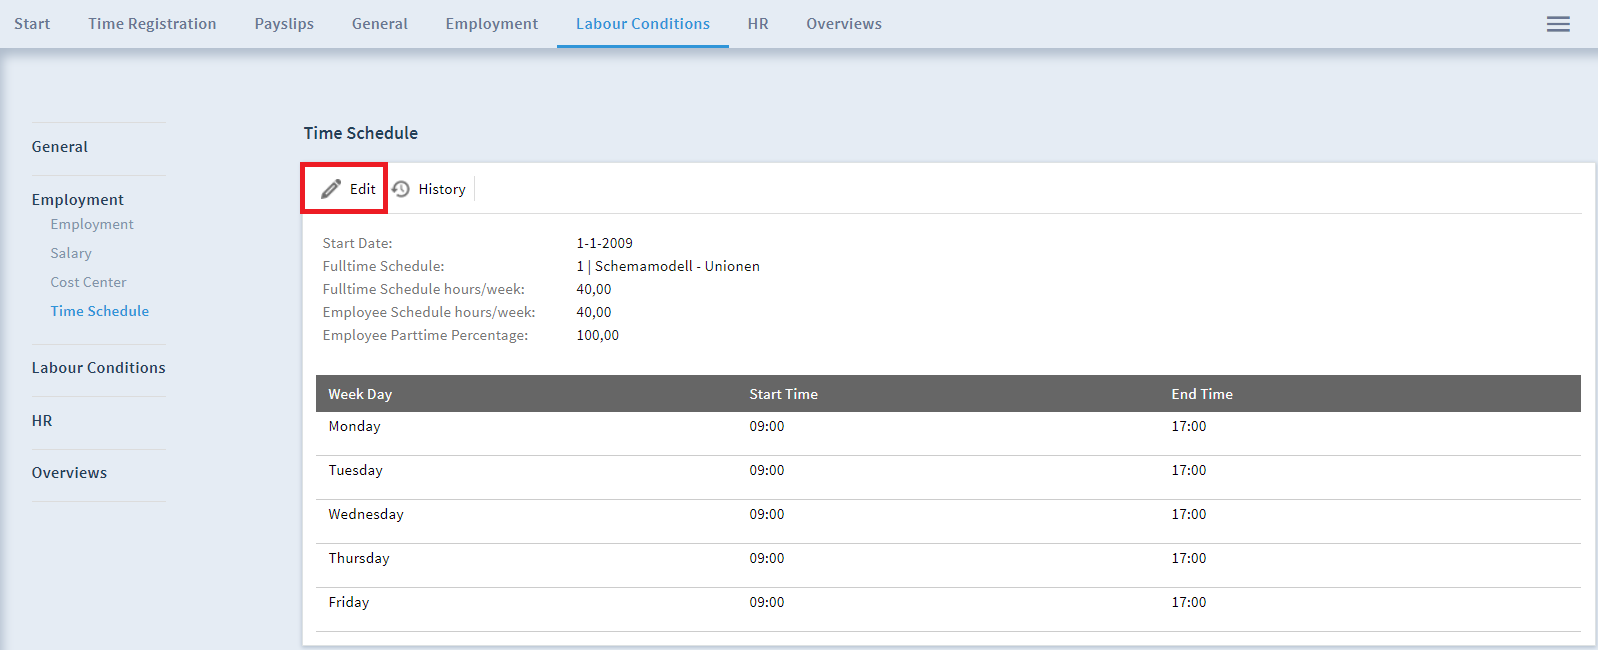
Schedule
You can find the schedule again at employee level via the menu button at the top right of the screen. Then click on "Schedule" in the "Employment contract" category. You have to fill in this dashlet even if an employee works without a schedule. In this case, enter 0 hours for all days.
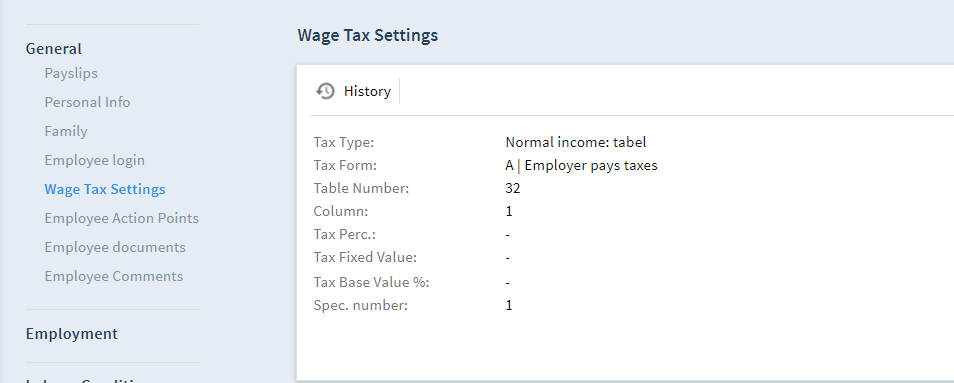
Payroll taxes
The following dashlet (Wage tax settings) can be found at employee level via the menu button at the top right of the screen. Then go to "Wage tax settings" in the "General" category.
Employee Wage Tax Settings
If you click on the model, a pop-up window will appear, where you can set up payroll tax details. Most data is filled in automatically. Make sure you fill in all relevant fields.
Comments