When you enter a new company into Visma Nmbrs, it's very important that this is done properly. So follow the step-by-step instructions below to be certain that you are applying the correct method of implementation. Possible pitfalls where you should pay special attention are also discussed here.
In this step-by-step plan, we'll go into the company settings, meaning only the settings at company level. You can set up a new company in one of two ways:
Adding a new company manually
In this example, we'll assume that a company is being added manually. The steps mentioned below - when creating a new company - must always be followed.
For accountants:
- In an accountant's environment, you must first create a debtor; refer this article for more information.
- Accountants are also able to select a default company. Refer this article for more information.
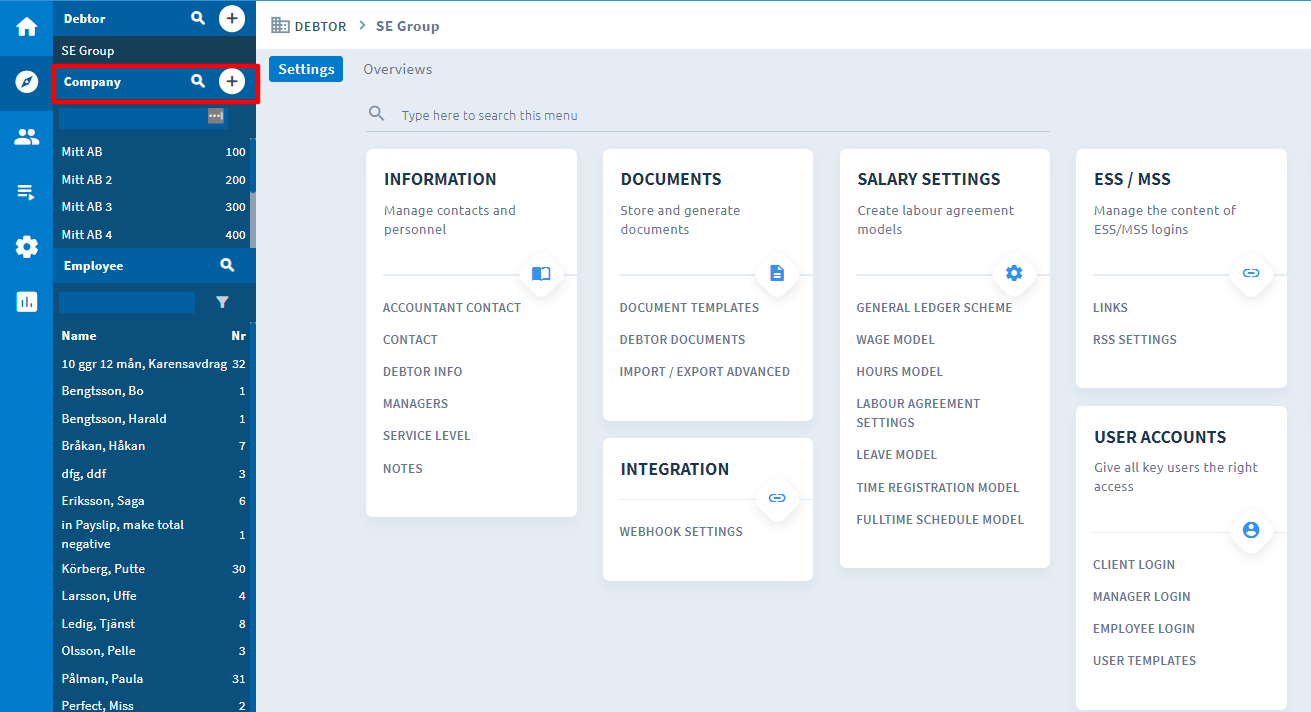
To create a company manually, click the plus sign next to 'Company' or use the 'New company' wizard as shown below:
Then fill out the company name and the period type. The period type is the pay period; in most cases, this is monthly.
Note:if you accidentally create a new company with an incorrect period type, it is not possible to modify this.
Company starting period / Company starting period invoicing
Usually, a new company starts as of the first period of the current year. If the company starts in a subsequent period, you can modify this in 'Company settings' under General. Adjust this first, even before you modify or enter other information! You can find the 'Company Settings' dashlet at company level → General→ Company settings.
First change the 'Starting period' and 'Starting period invoicing'. After you save, Visma Nmbrs will automatically modify the 'Current period'. This can't be done manually!
Once you've completed a run, it is no longer possible to modify the start invoicing period.
Note: After saving, you may need to click 'edit' and then save again in order to change the start period.
The starting period is the period when the first payroll taxes must be paid to the tax authority.
You can also select a number of options here, such as 'allow part-time percentage above 100%.'
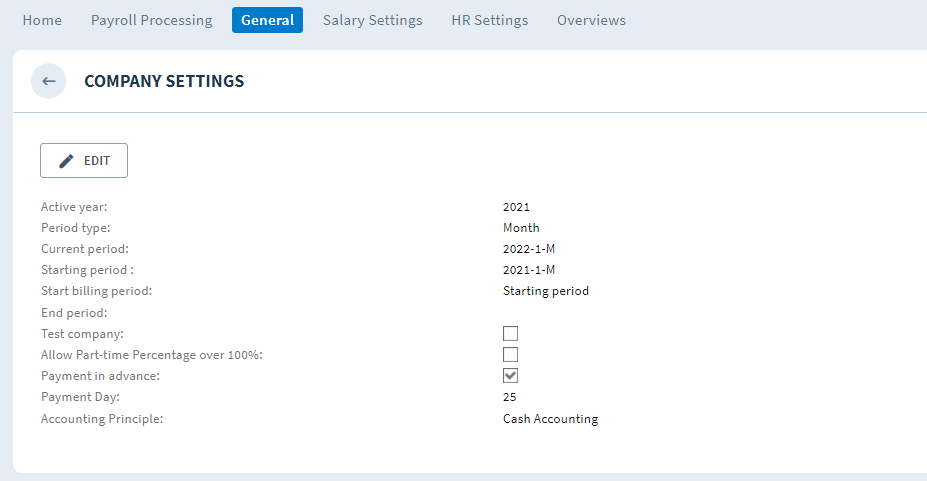
Note: The "Payment Day' is set on default on the 25th of the month. By editing this, you are able to change the date.
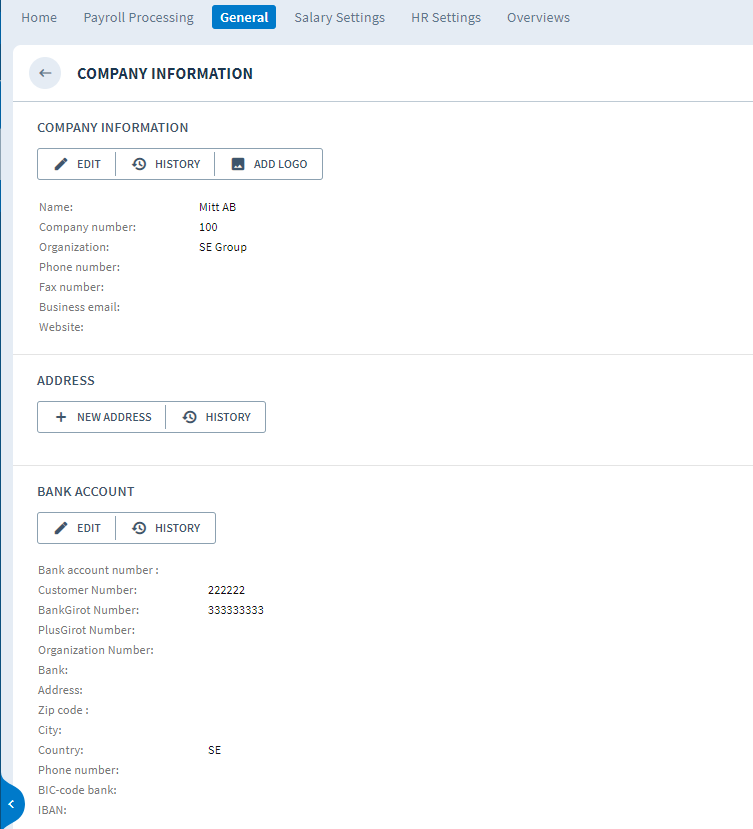
General
Through the General dashlet, you can enter the company information: company contact information, company address (displayed on the payslip) and bank account number (when using the SEPA payment file, payment is made from this account number). You can find the 'Company Information' dashlet back at company level in the 'General' category under Settings.
Payroll Tax Number
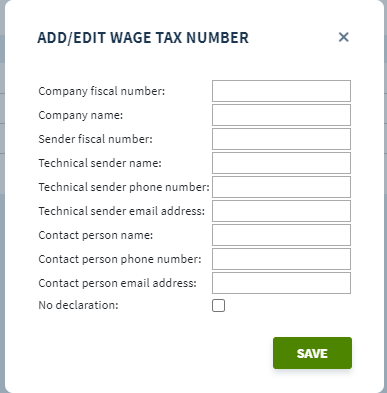
In the Salary Settings dashlet, enter all mandatory fields for the tax authority: wage tax number, company period type, company name, contact person and phone number. If one or more of these fields is not filled in, an error message appears when creating a payroll tax return and it cannot be sent.
Now continue with setting up the company settings under 'Payroll Settings'. Below you can see which categories must be filled out at minimum for the start of a company. If you follow the step-by-step plan, it is not necessary to add leave settings.
Full-time schedule
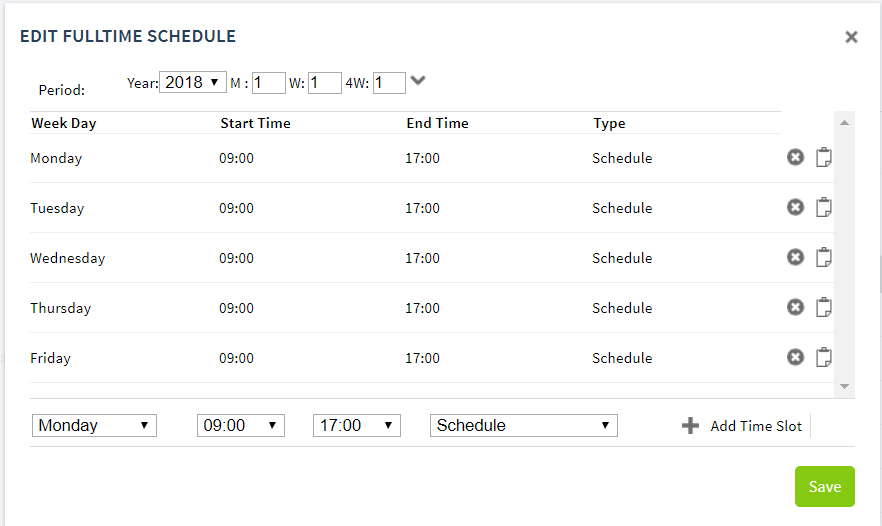
Enter the company's full-time schedule at company level. Usually, a 40-hour work week applies. If a different full-time work week applies, this can be modified here.
Comments