In this article we will explain how you can create and add functions for employees. Users with an accountant environment can add functions at debtor level. Because the debtor level is missing for users with a business environment, they can add functions at master level.
It's also possible for both types of users to add functions directly at employee level.
Please note: function numbers may contain a maximum of 10 digits and function names may contain a maximum of 50 characters.
Go to the Function dashlet in the accountant environment
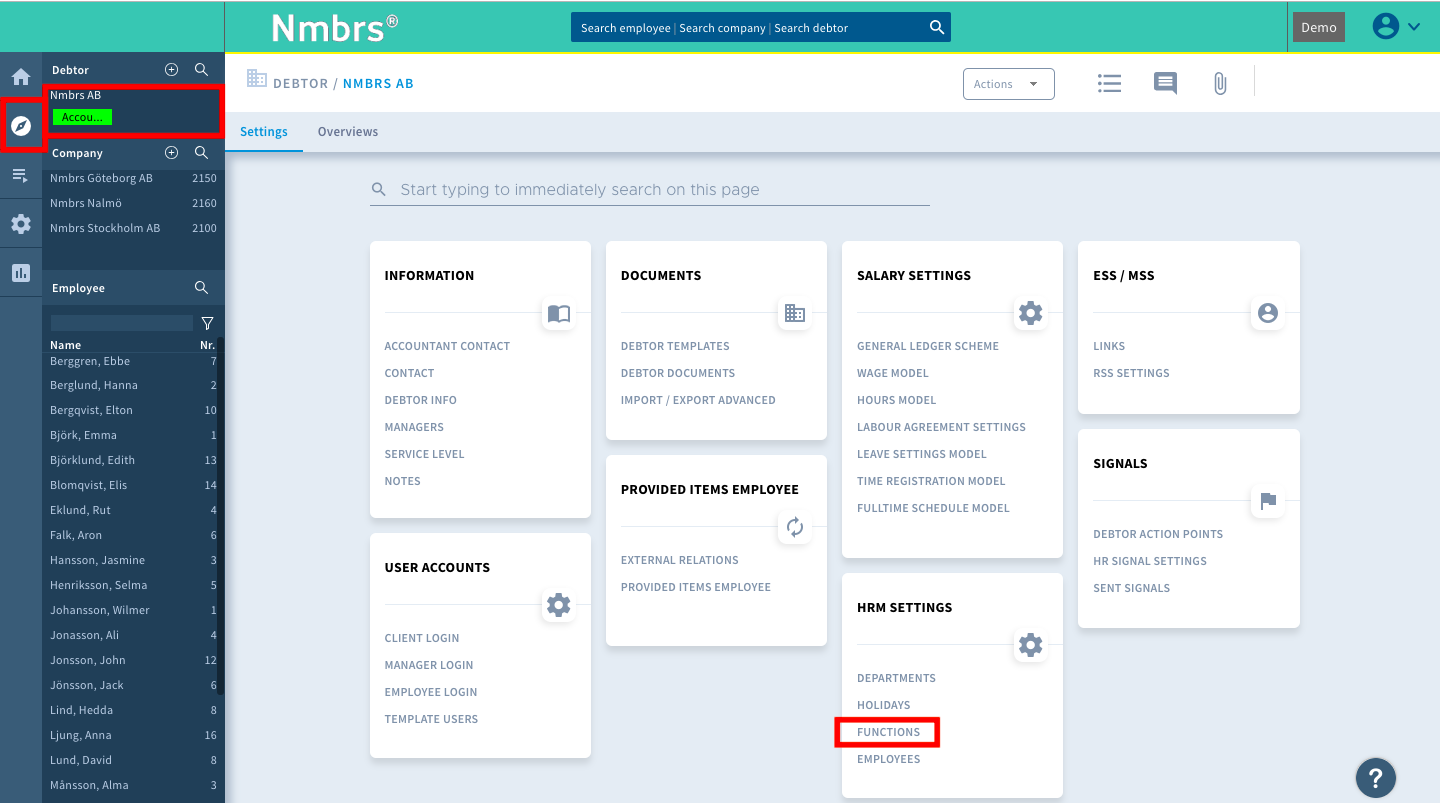
If you want to add a function as an accountant, follow these steps to go to the Functions dashlet:
1. Go to the 'Explorer' tab.
2. Go to debtor level.
3. Click Functions under the HR Settings heading.
Go to the Function dashlet in the business environment
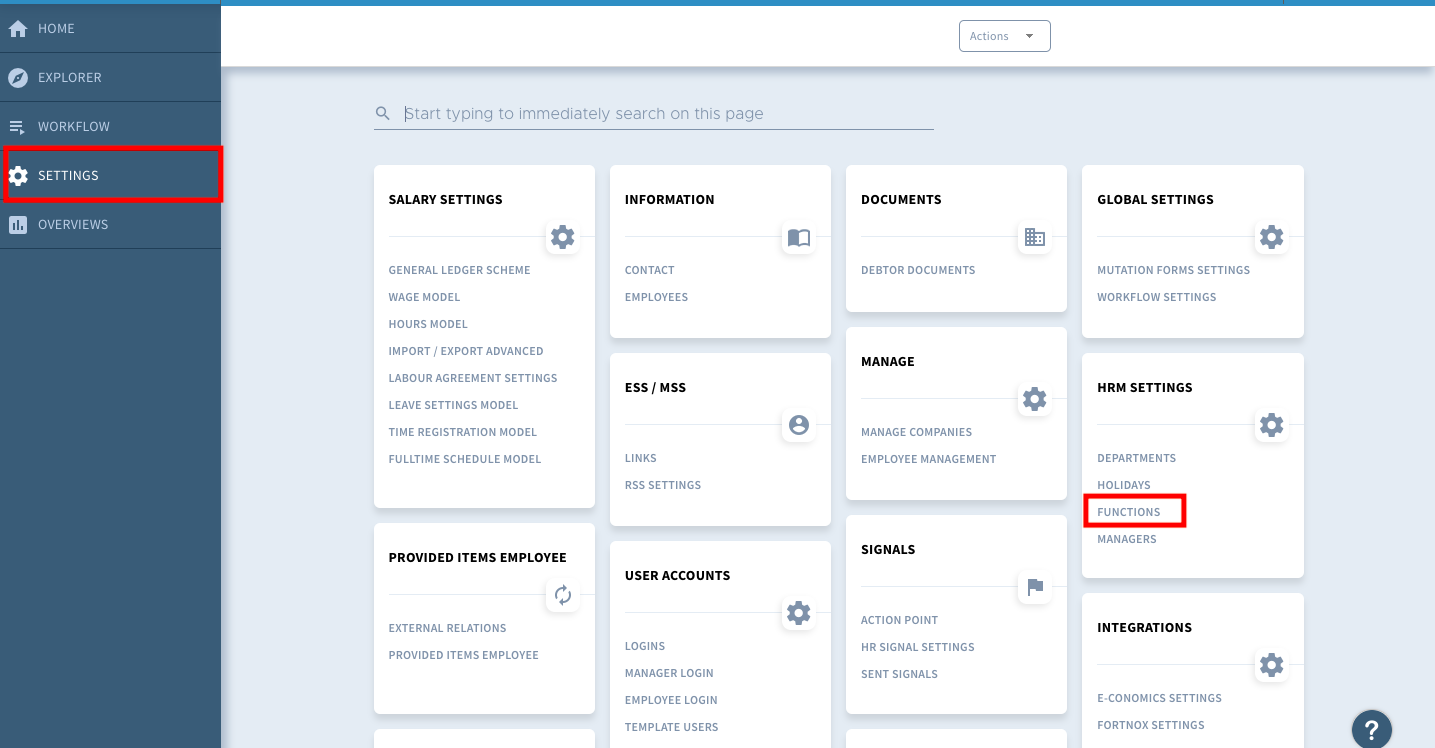
If you have a business environment, you can follow the next steps to go to the Functions dashlet.
1. Go to the Settings tab at master level.
2. Click Functions under the HR Settings heading.
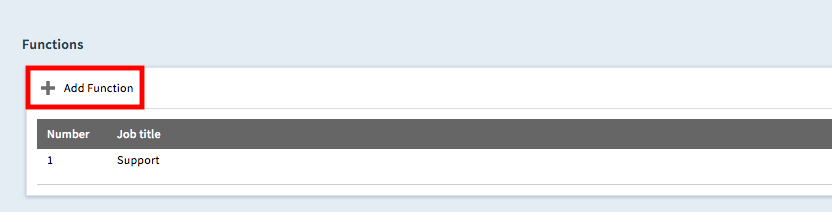
Adding a new function
Once you are in the Functions dashlet you can add a new function by clicking the "Add function" button.
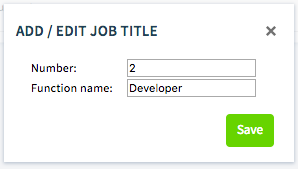
Give the new function a name and number. Click on 'Save'.
Adding a function for an employee
You can also add functions at employee level. To add functions using this method, go to the Employment Contract dashlet and click "More...".
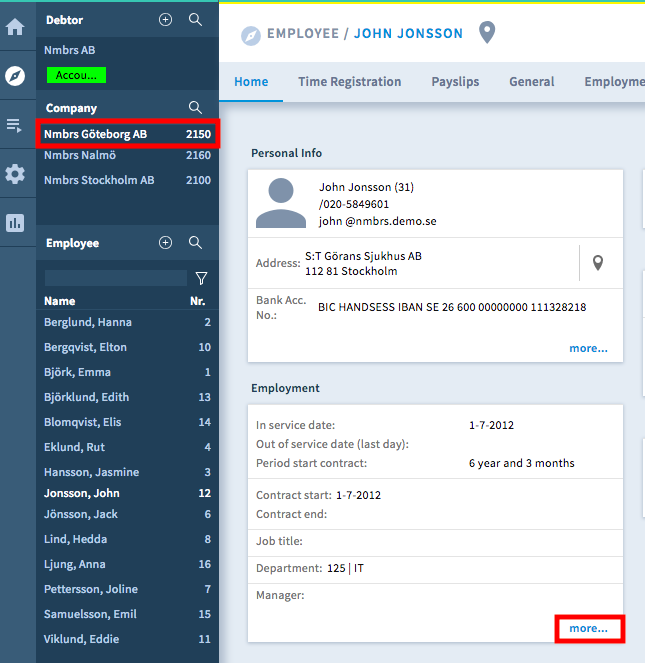
Then scroll down and click the Function dashlet on the Function button.
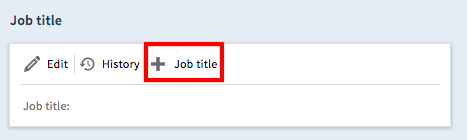
Give the new function a name and number. Finally, click Save to create the new function.
Setting up a function for an employee.
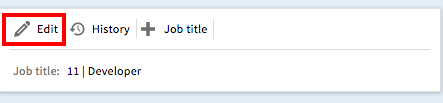
To set up a function for an employee, go to the Function dashlet under Employment Contract at employee level. Then click the Edit button.
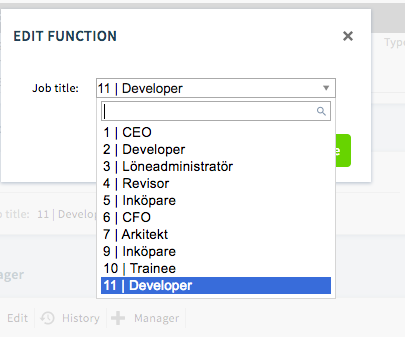
Select a function and click Save.
Comments