This is an introduction to get to know Nmbrs®. This article helps you to set up your own company in Nmbrs® in 20 minutes and to calculate the first payslip. For each category we ensure that a standard scheme is set up quickly. Further refinement of employment conditions are dealt with in the implementation program and can be added afterwards without extra efforts.
Are you already sure you want to use Nmbrs, you can follow the program at http://nmbrs.com/nl/business-startup.
For each category, we consider possible different ways of applying and you get tips and tricks to determine what is the most efficient method at the moment.
- Create a new company
- Company Information
- Company Settings
- Setting up Labour Agreement models
- Labour Agreement Selection
- Create a new employee
- The first payslip
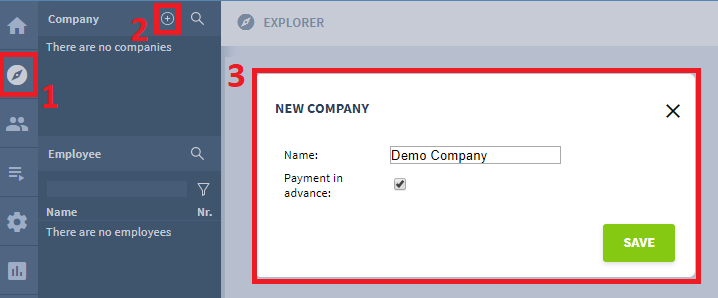
1. Create a new company
Open your Free Trial, log in and go to "Explorer" (1). Click on "+" on the right next to company (2). Choose at type of period whether a monthly salary payment is made per month, 4 weeks or per week and click on save (3).
2. Company Information
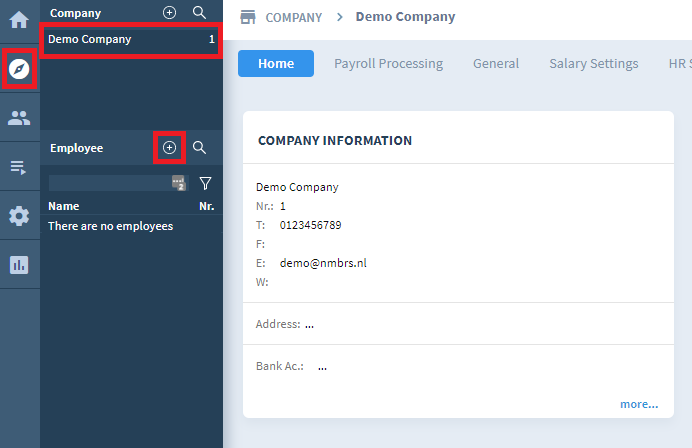
Click on "Explorer" (1), select the new company (2) and click on "more" (3) as indicated below.
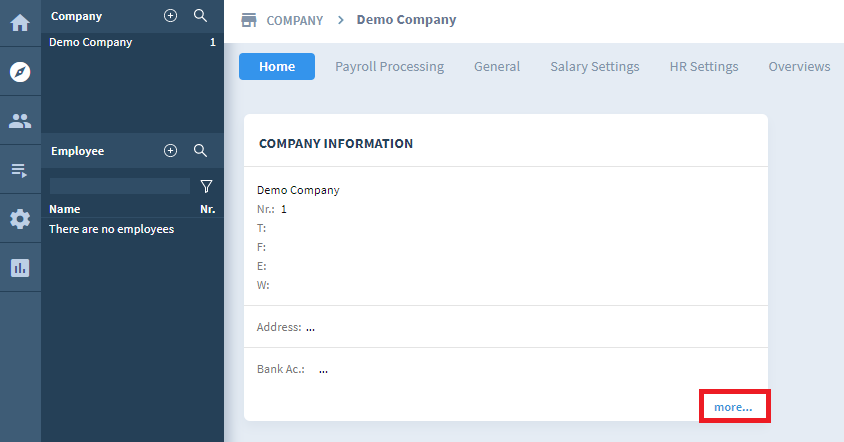
From this screen it is easy to go through the settings of the company, all categories are below each other.
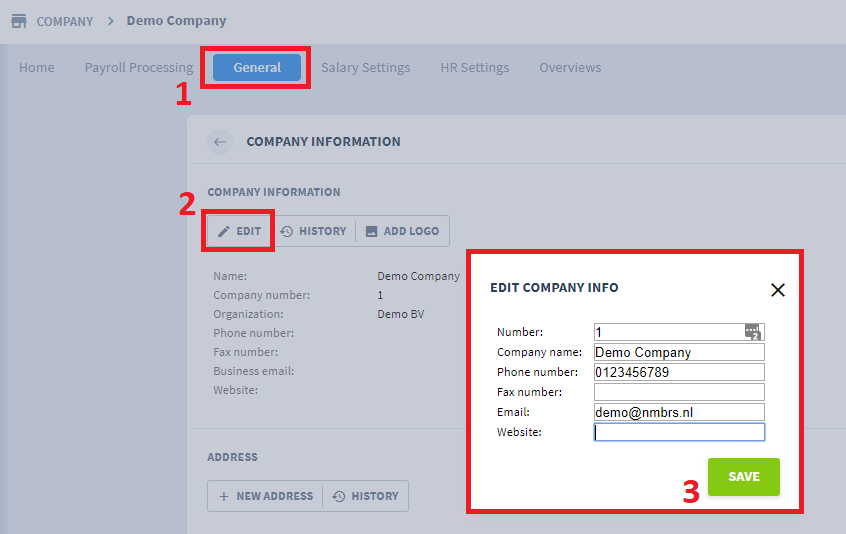
Enter the company details as completely as possible in the "Company information" (1). Click on "edit" in the relevant dashlet (2) and enter the data, in the pop-up and click on save (3).
It's also possible to add address and bank account information on this page.
Comment on "Contact person"
This is the person who will be informed by email of the tasks performed during salary processing and HR signals. In a later stage of implementation we will give more information about this.
3. Company Settings
In the tab 'General' you can go to the 'Company settings', you can decide on when the company starts or if this company is a test company.
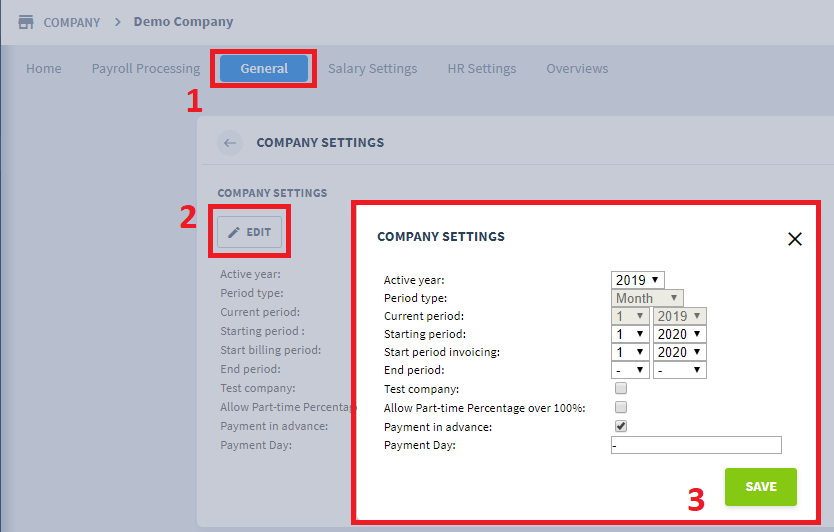
Comment on "Current period" and "Starting period"
The start of a business can fall into 3 categories at Nmbrs;
1. A new wage tax number has been issued by the tax authorities during the year. At "Current period" and "Start period", select the first period for which a declaration must be made.
2. The current year's administration is "converted" to Nmbrs®. In this case, the previously processed administration for the current year must be "recreated" in Nmbrs®. The administration in Nmbrs® must have exactly the same values that were previously sent from another application to the tax authorities. This is necessary to be able to submit corrections later and to realize correct total values at the end of the year. In this case, under "Current period" and "Start period", choose the first period for which a declaration has been made for the current year. This is almost always 1-20XX.
Later we will come back to the details of "re-building".
3. From the following tax year, wage tax declarations will only be actually submitted from Nmbrs®. In this situation it does not matter which "Current period" and "Start period" are selected, take the same period. From the chosen period, test processing can be done to see if Nmbrs® matches the current administration / application. Bear in mind that the entered data will no longer appear in the historical data of the administration. When the actual administration is started, the start period is set to 1-20XX and the history is no longer available in overviews, for example.
Comment on "Start period invoicing" and the "Test company" checkbox
- Under "Starting period invoicing" you choose the first period for which a wage declaration is actually made. From that period onwards, employees are counted for invoicing and there is the option of actually sending the wage tax.
- The "Test company" checkbox ensures that no email signals are sent and automated tasks are not yet being performed. Do not select this option for the "Hands-on" tutorials.
4. Setting up Labour Agreement models
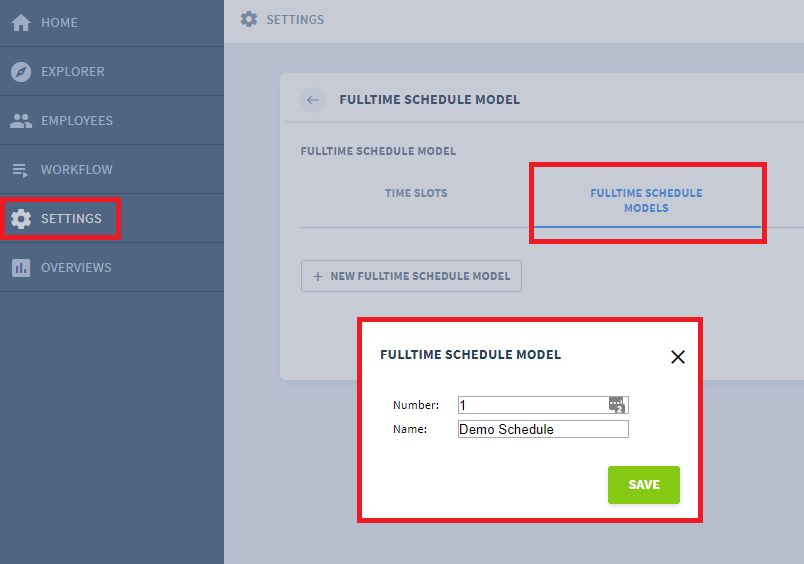
Fulltime Schedule Model
Go to 'Settings' (left menu) and search for + click on 'Fulltime Schedule Model', go to the tab 'Fulltime Schedule Models' to add a new model:
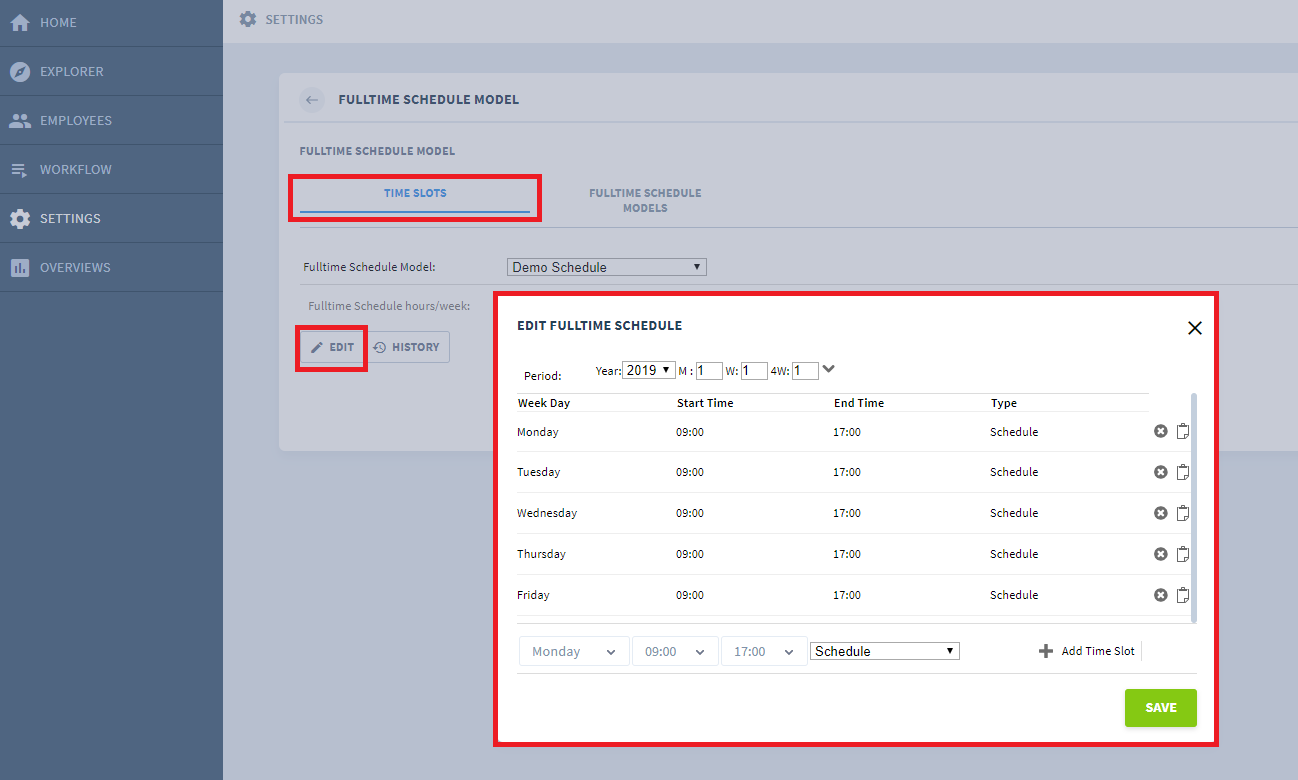
Next, it's possible to add Time Slots to this model:
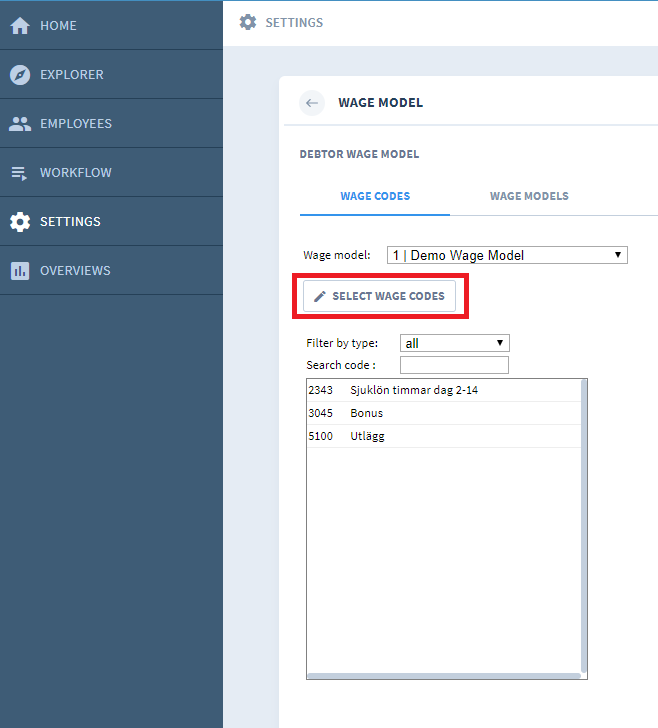
Wage Model
In the same way it's possible to add a Wage Model and select wage codes in this model:
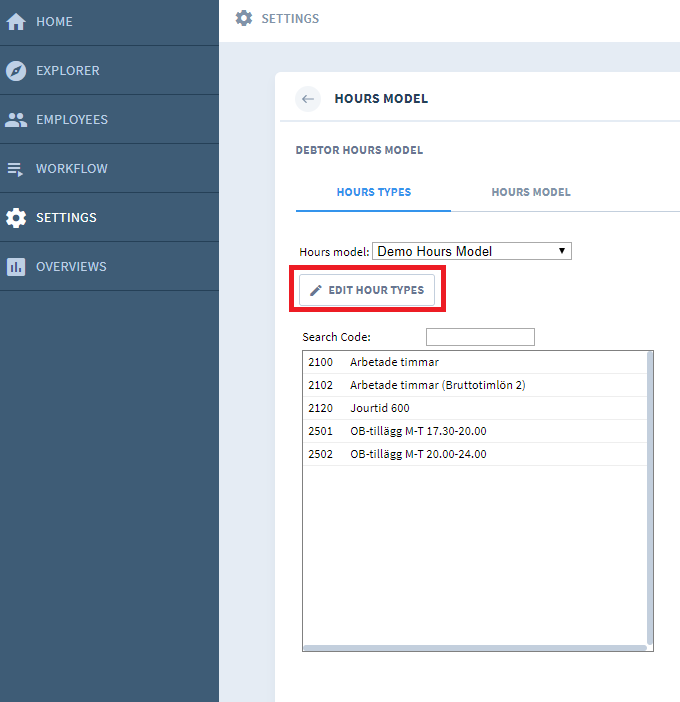
Hour Model
Go to the Hours Model's page, add a new one and edit the hour types to add new hour codes to the Hours Model:
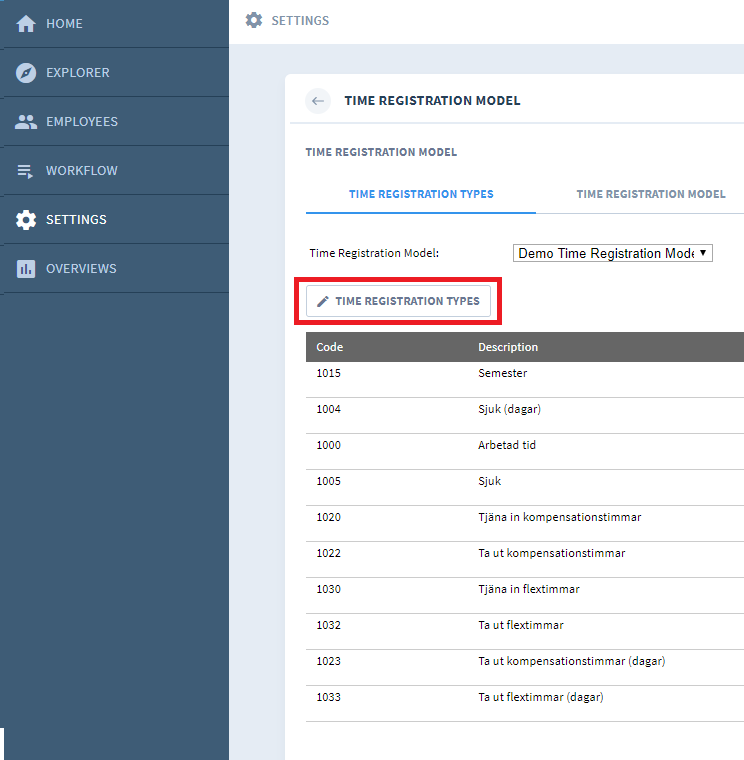
Time Registration Model
In the Time Registration Model it's possible to add more time registration types:
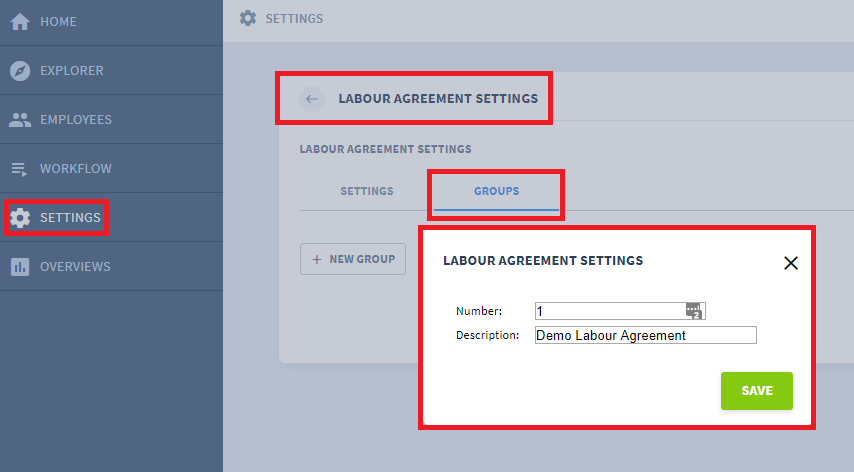
Labour Agreement Settings
Go to Settings (left menu), search for + click on 'Labour Agreement Settings', go to 'Groups' and add a new group:
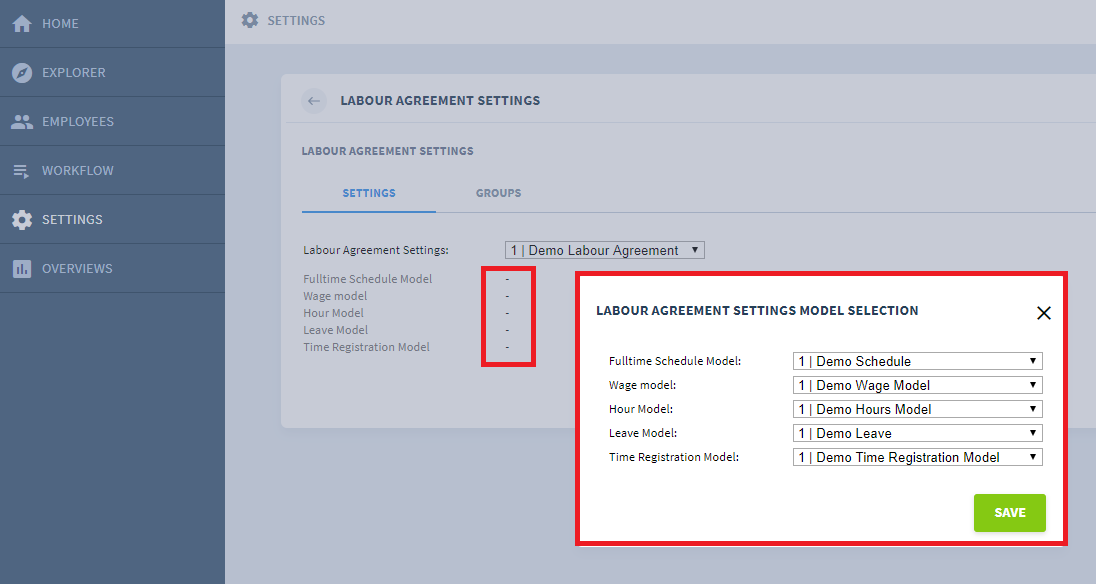
After adding a new group, it's possible to add all the models to this Labour Agreement:
5. Labour Agreement Selection
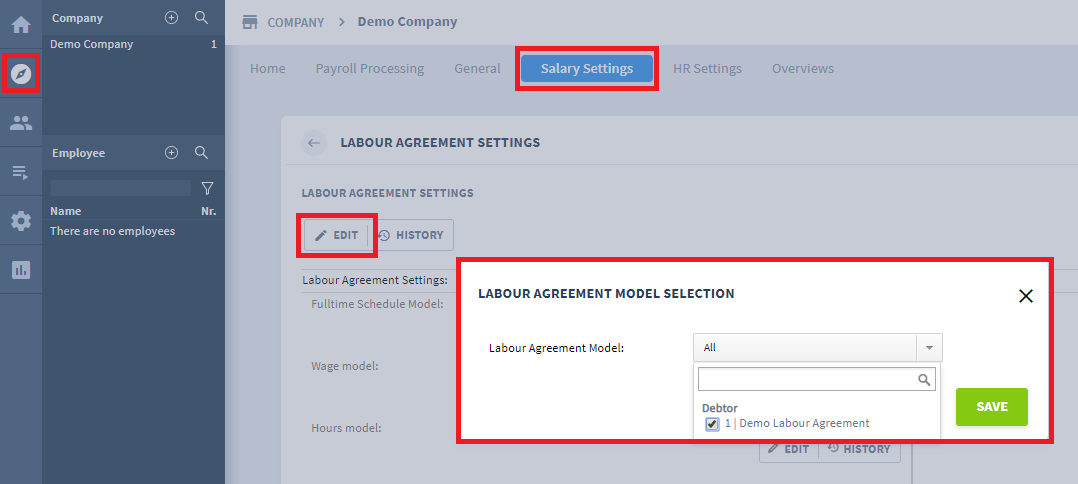
Go to 'Explorer', click on the company, go to 'Salary settings' --> Labour Agreement Settings. Click on 'Edit' en select the model that should be applied:
6. Create a new employee
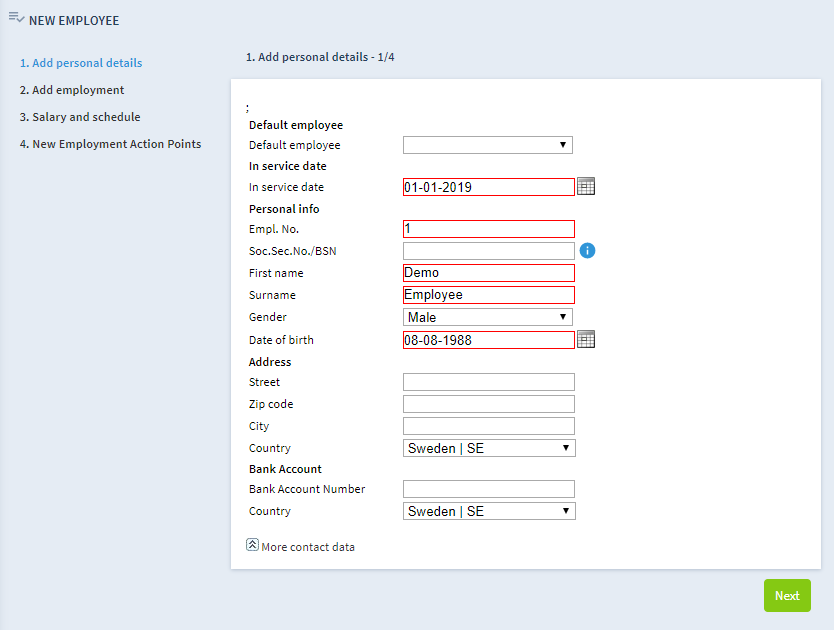
Go to 'Explorer', select the company and click on the '+' icon to start the 'new employee' wizard:
Personal details
Fill all fields as much as possible, the fields with a red border are mandatory. Click on 'Next' to go to the next screen:
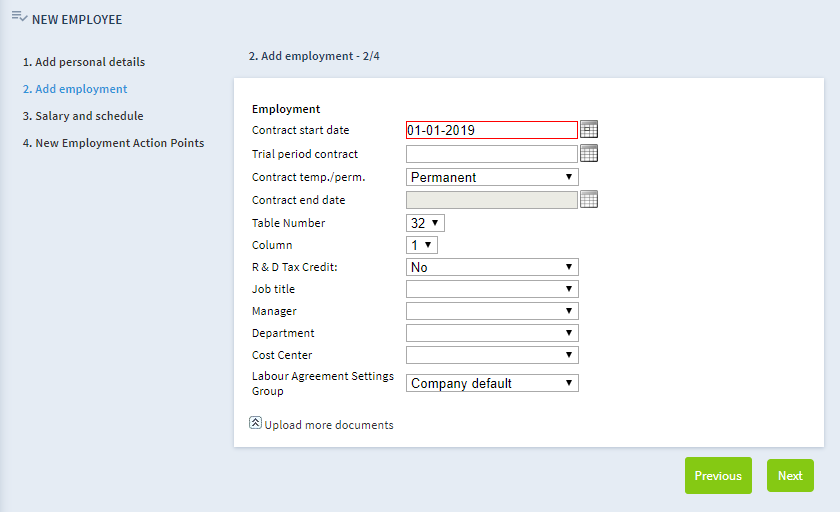
Employment details
Decide what employment details are applicable to this employee:
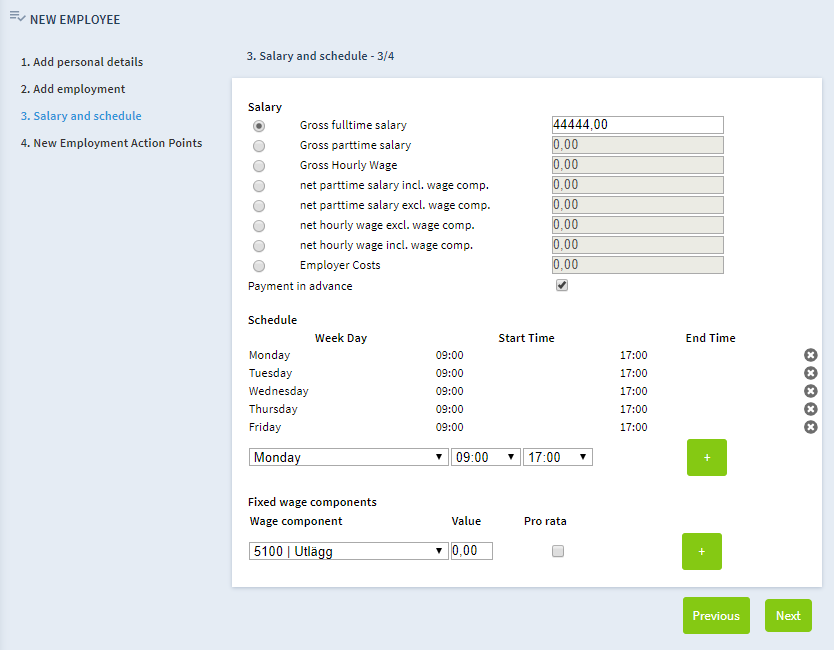
Salary and Schedule details
Fill in the salary, change the schedule and/or add wage compenents right away:
Click on 'Next', the final step of the "New Employee" wizard focuses on HR related action points. These can be skipped because they are not relevant to the introduction.
Click on "Finish". Click on the "To employee" button.
7. The first payslip
The employee has been created with this, the administration is now ready to do salary processing.
In Nmbrs®, an employee's payslip can already be seen before doing the a run, under the "Payslips" tab.
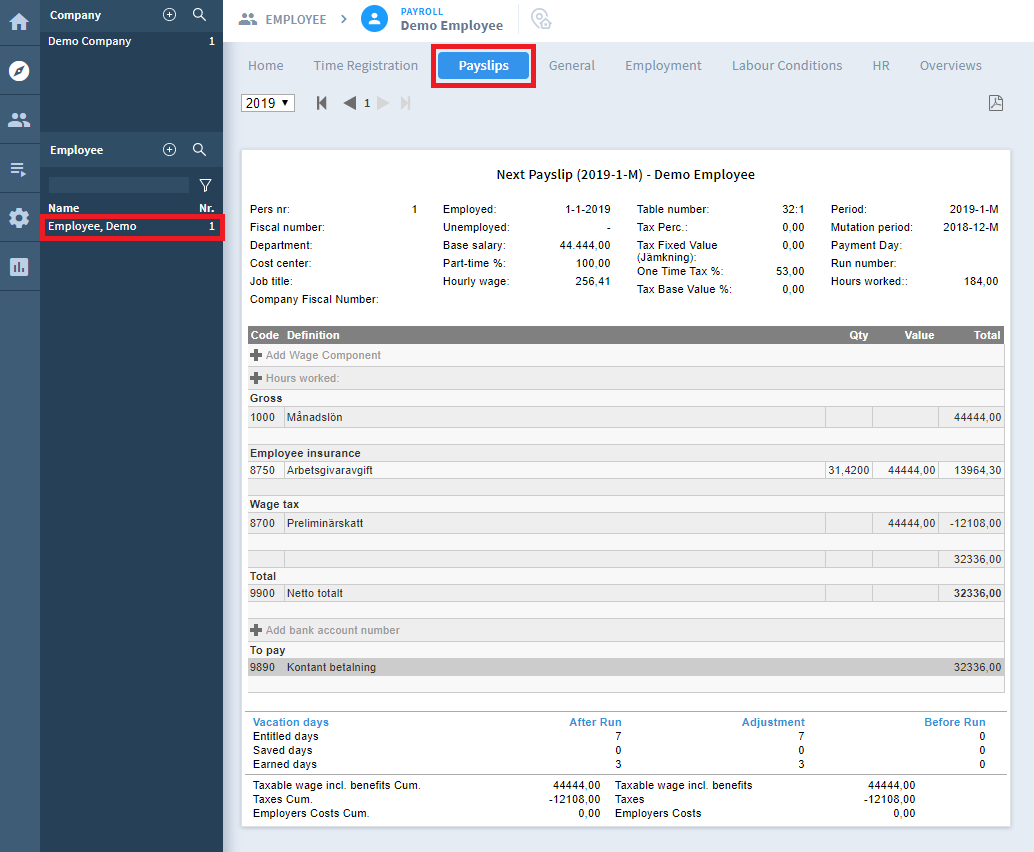
On the so-called "Interactive payslip" you can see the result for the next payment. (If no changes have been made in the past for this employee)
This functionality is called "Interactive payslip" because many of the fields on the payslip can be adjusted by clicking on it.
Comments