Master Payroll settings
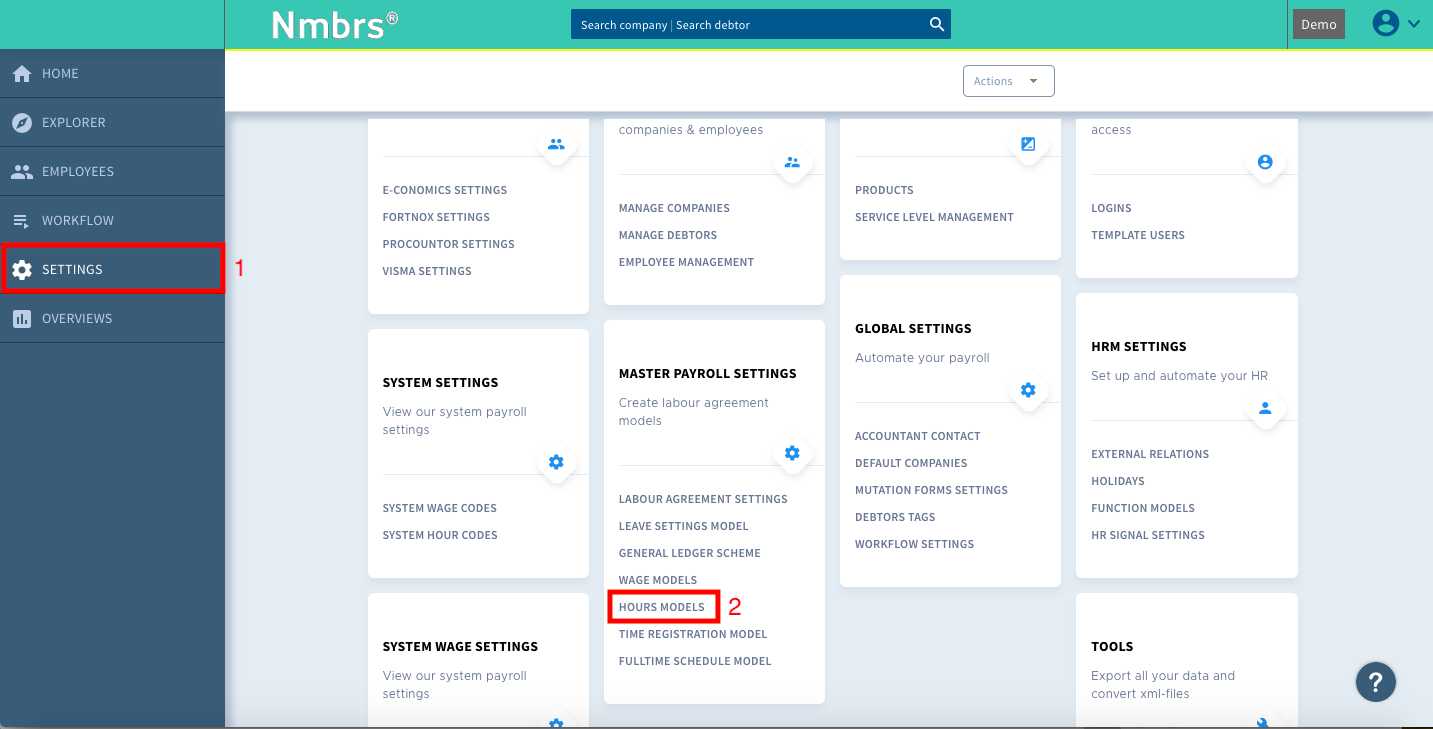
Click Settings on the left of the menu and then click Hours Models under Master Payroll settings.
Hours model
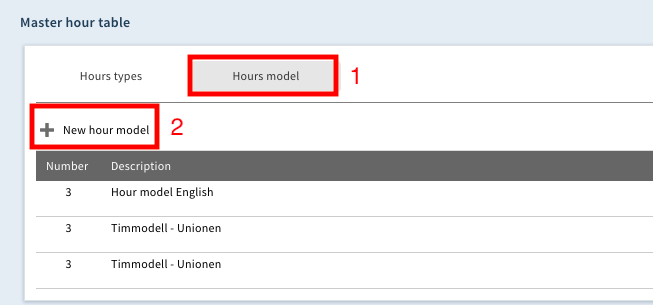
If you want to create a new hours model, click the Hours Model tab and then click 'New hours model'.
You can also delete an hours model here by using the cross at the end of the row. The hours model to be deleted must first be unlinked in the Payroll settings dashlet at company level (see later in this article).
Master hours model
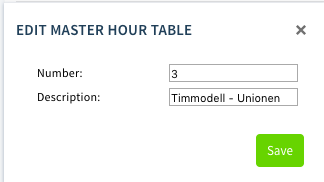
Give the new hours model a number and name, then click Save.
Adding the hour types
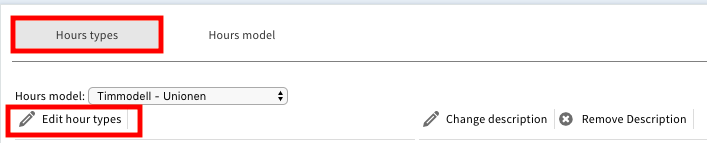
Once the hours model has been created, you can add the hour codes.
Selecting hour types
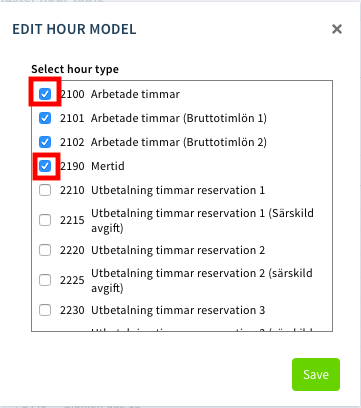
Click the hour codes you want to add and click Save.
The added hour type in the list
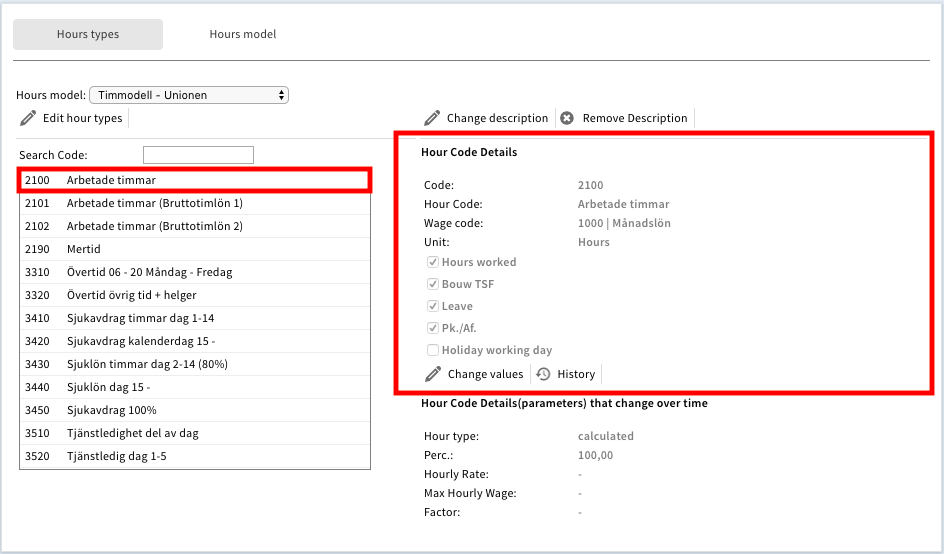
1. Click on the hour code that you have just added.
2. Here you will find the details about the hour code.
You can also change the description, details and base value here.
You will then see the newly added hour codes, including the output payroll codes. These are the payroll codes that appear on the payslip when these hour codes are used.
In the article Modifying hour codes via the Settings tab you'll find a description of how an hour code can be modified.
Comments